
Administrators can use the bulk action tool to simultaneously archive or permanently delete multiple users based on their login activity. Because this process can involve a large volume of data, it runs in the background. You will receive an email notification as soon as the process is complete.
Navigate to the Users page
Navigate to the Settings menu, select the Account tab, and click on Users. At the top of the user list, click the Bulk archive/delete button to open the management window.
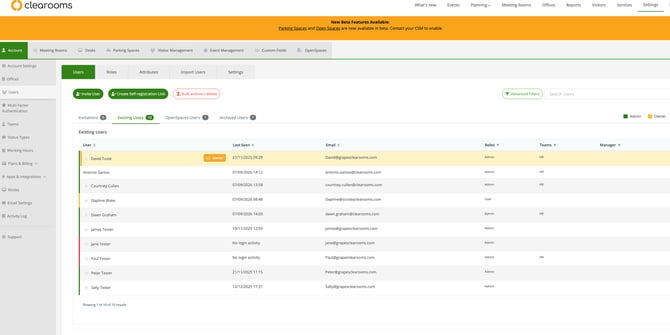
Select Your Target Users
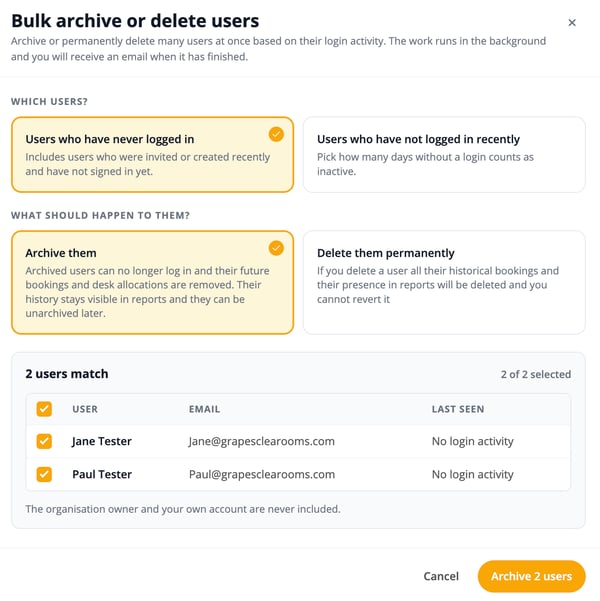
Under the WHICH USERS? section, define which accounts you want to manage by selecting one of the following options:
-
Users who have never logged in: This targets users who were recently created or invited but have not yet signed in.
-
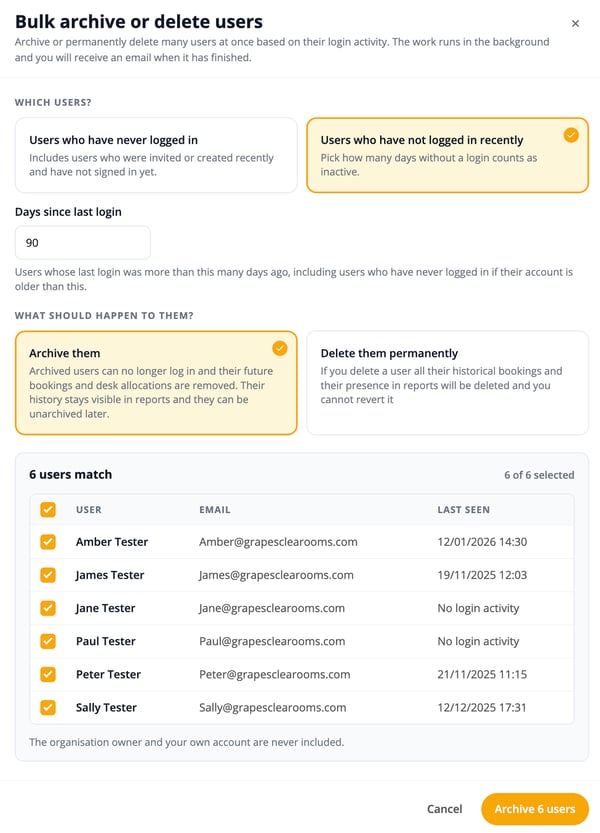
Users who have not logged in recently: This option allows you to set a specific threshold of inactivity. Enter a number in the Days since last login field (e.g., 90 days). This targets anyone whose last login exceeds this timeframe, including users who have never logged in if their account creation date is older than the specified days.
Choose the Action
Under the WHAT SHOULD HAPPEN TO THEM? section, select how you want to process the targeted users:
-
Archive them: The selected users will no longer be able to log in. All of their future bookings and desk allocations are immediately removed. However, their historical data remains visible in system reports, and you retain the ability to unarchive them later.
-
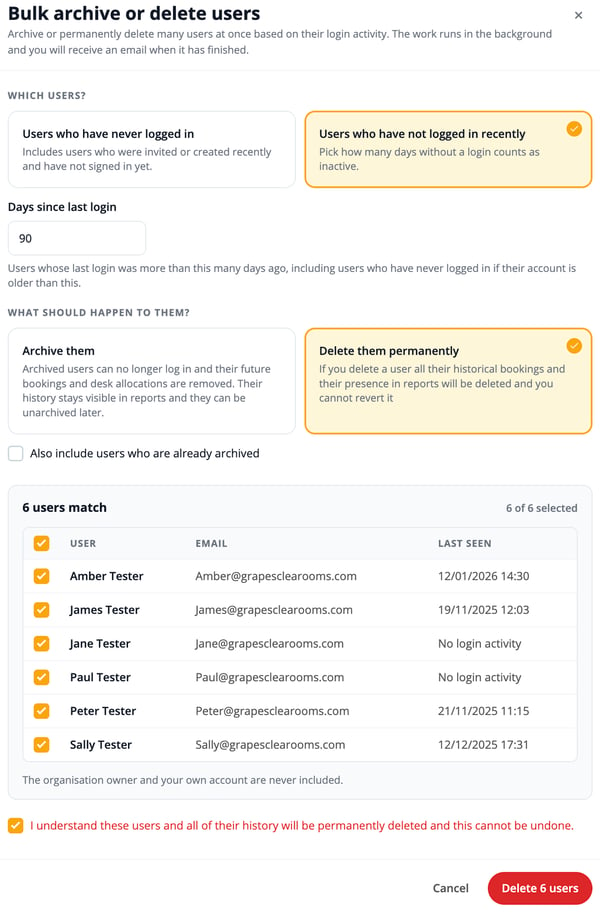
Delete them permanently: This completely removes the users from the system. All historical bookings and their presence in reports will be permanently erased. Optional: When selecting this route, you can check the box to Also include users who are already archived.
Review and Execute
Once your criteria are set, the system will auto-populate a list of matching users at the bottom of the window, displaying their Name, Email, and Last Seen status.
Review the list carefully. You can manually uncheck the box next to any user you wish to exclude from the bulk action.
Note: The organisation owner and your active administrative account are automatically protected and will never appear on this list.
⚠️ WARNING: This feature can be used to bulk delete SSO and non-SSO users.
SCIM users cannot be deleted using this feature. SCIM users are linked to your Active Directory and must be deleted through your internal system, such as Azure. These users will not appear in the list of users available for bulk deletion.
To Finalize:
If Archiving: Click the yellow Archive [X] users button.
If Deleting: You must first check the confirmation box at the bottom stating, "I understand these users and all of their history will be permanently deleted and this cannot be undone." Once checked, click the red Delete [X] users button.