
There is no limit to the number of Offices you can set up

From Settings > Account > Offices Click "New Office"
At the top of this form, enter the name of the new office, set the time zone and other attributes, then click "Add" The new office will appear in the list below and will by default be disabled. This means only you (and other Administrators) will be able to see the office.
To enable it so people can see it, just turn the toggle button on next to the Office.
Editing Existing Offices
Once an Office exists, click on the name of the Office from the main Offices page. This opens a form with options to edit:
-
Name: The Name of the Office as it will be seen by all Users
-
Hot Desk Banner: This banner information is unique to the Office and can be seen by all Users. This can be edited here or on the main Offices Tab when you click on Edit Office Plan
-
Time Zone: Set the relevant time zone for the office
-
Desk Size: This is the size of the bookable desk icons
-
Default Office: Check this if the Office is the most used on the account. ! Users can set their own default office from their profile page, which will override this account setting.
-
Restrict to Specific Users or Teams: If the Office is only used by a small group of Users or you wish to restrict access, you can turn this on and select users who are permitted to see and book it.

Setting Up Your Office Plan
To upload a floor plan, go to Settings, select “Offices,” and then choose “Edit Office Plan.”.
From there, click the Upload Office Plan button in the top left corner of the page and navigate to your saved file. GIF, PNG, and single-page PDF formats are supported. Select your file and click Open to upload.
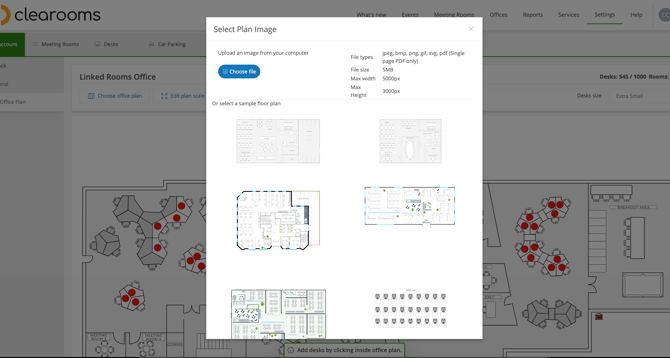
The image will be saved to your account, and you can update it at any time by repeating the same process whenever your plan changes.
Your bookable desk icons do not move when you upload a new image so if the plan is a different size or desks have changed position you will need to re-locate the desk icons.
You can repeat this step as often as you like to update the plan when the office layout changes