
A guide to the updated floor plan viewer and the new (V2) plan editor, including zoom controls, saved views, icon scaling and switching over from the legacy editor.
Overview
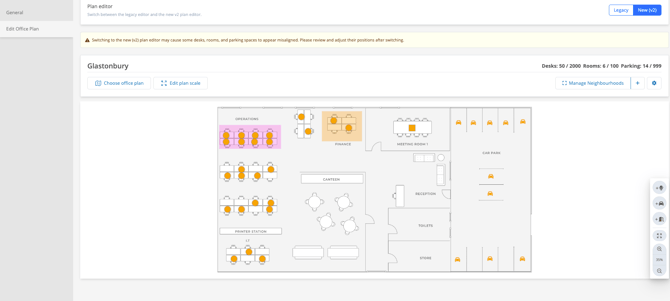
Locations is an update to how Clearooms processes and displays your office floor plans. It fixes the issue where desk, room and parking icons could appear misaligned on the mobile app when an office plan is very large or densely populated with icons.
Alongside this, the office plan viewer now has flexible zoom controls, and admins editing an office plan get a new V2 Plan Editor with independent icon sizing for desks, rooms and parking spaces.
Who this affects:
- New customers who sign up after this update is released are set up on the V2 Plan Editor automatically.
- Existing (legacy) customers keep their current office plan editor and are not moved over automatically. They can switch to the V2 Plan Editor at any time (see “Switching from the legacy editor” below).
- The change applies across the admin portal, the mobile app and the Teams app/portal, so behaviour is consistent everywhere users view or book from an office plan.
Viewing your Office plan:
Anyone with access to an office floor plan can use the new zoom controls. This is especially useful for large office plans, for example offices with several hundred desks.
- Go to Offices in the main menu and select the office you want to view.
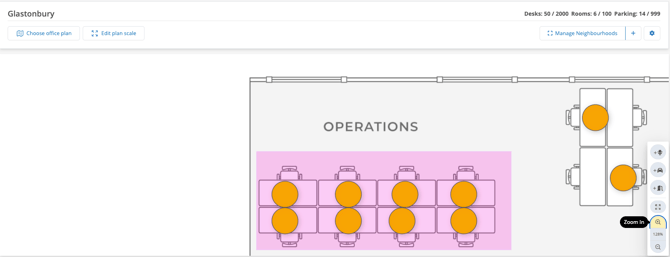
- Use the zoom controls to zoom in or out on the floor plan. Zoom out to see the whole plan at a glance, or zoom in to work with a busy area more easily.
- Once you're happy with the zoom level, select Save View. This is saved against your own user account and is applied automatically every time you open this office plan, it doesn't change what other users see.
- If a plan is zoomed in or out too far, select Scale to Fit to reset it so the whole plan fits neatly on your screen.
Editing your floor plan with the V2 Plan Editor
Admins editing an office plan will see a Plan Editor toggle at the top of the Edit Plan page, letting you switch between the Legacy Editor and the new V2 Plan Editor.
Scaling desk, room and parking icons
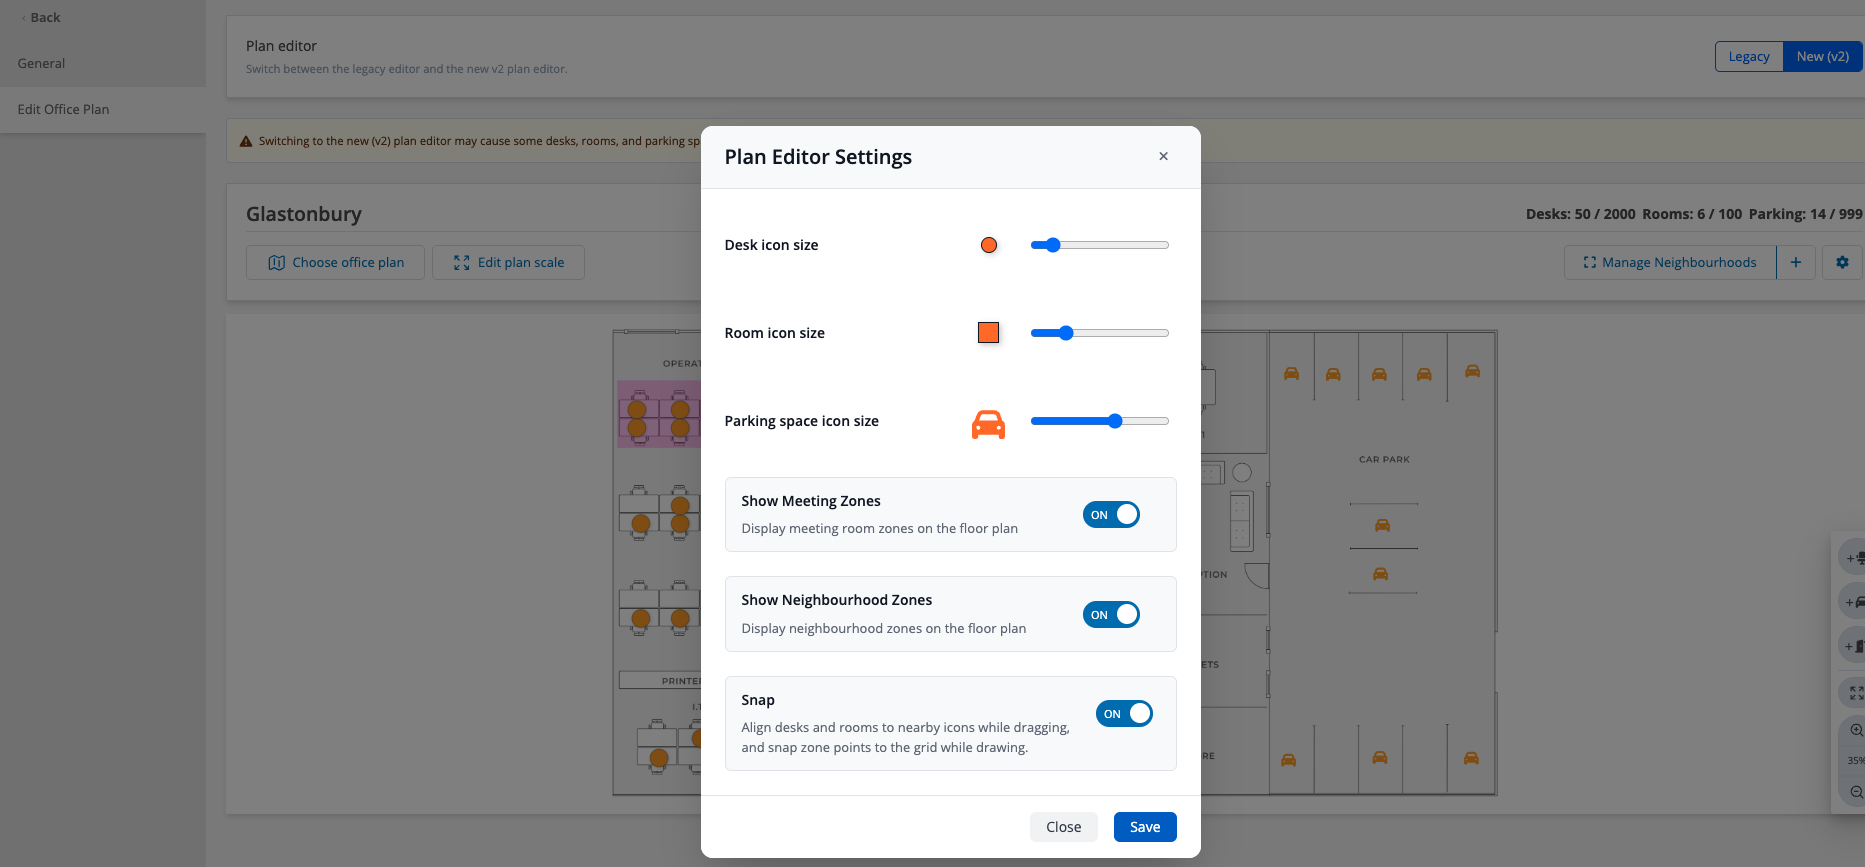
The V2 Plan Editor lets you scale desk icons, room icons and parking space icons independently, so you can fit denser floor plans more comfortably than the previous fixed small, medium and large sizing.
- Open the office and select Edit Plan.
- At the top of the page, confirm the Plan Editor is set to V2 Plan Editor.
- Click the setting icon, This will open up Plan Editor Settings
- Use the desk icon size, room icon size and parking space icon size controls to scale each icon type to suit your floor plan.
- Select Save to apply the new sizes to the plan.
Adding desks, rooms and parking spaces
The way you add new items to an office plan has changed slightly to match the portal's updated design. The underlying settings and options, including Advanced Allocation, work exactly as they did before.
- On the right hand side of the Edit Plan page, select Add Desk, Add Room or Add Parking Space.
- Click on the office plan where you want to place the new item.
- Complete the pop up form to name the desk/meeting room/parking space etc
Note: Previously you could click directly on the plan to add an item. In the V2 Plan Editor, you must select the item type from the right hand menu first, then click the plan to place it.