
Design your sticker
Step 1: Start a new order
Go to Settings, open the Desks tab, then select QR codes in the left menu.
On the Desk QR sticker orders page, click Create order.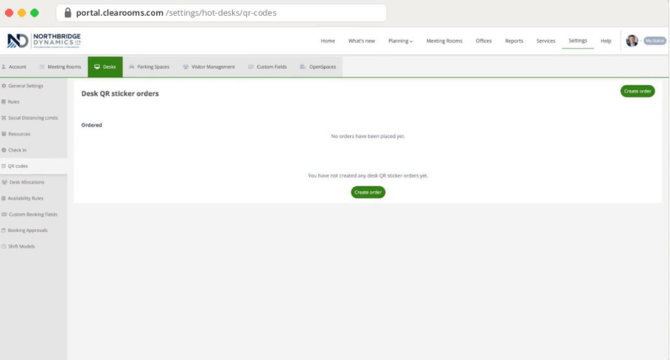
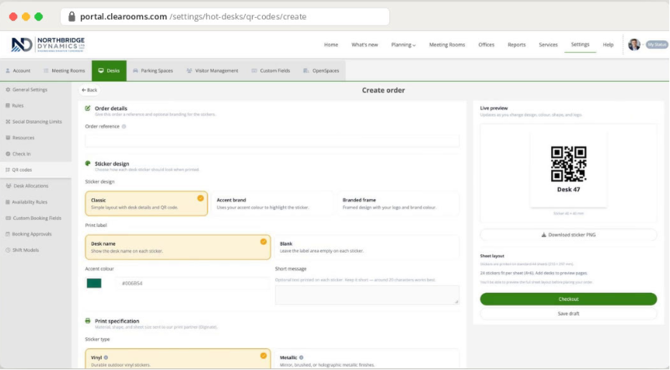
The Create order page opens. A Live preview on the right updates as you change the design, colour, shape and size.
Step 2: Add order details
Under Order details, enter an Order reference so you can find this order later.
Step 3: Choose a sticker design
Under Sticker design, pick one of three layouts:
- Classic: simple layout with desk details and the QR code.
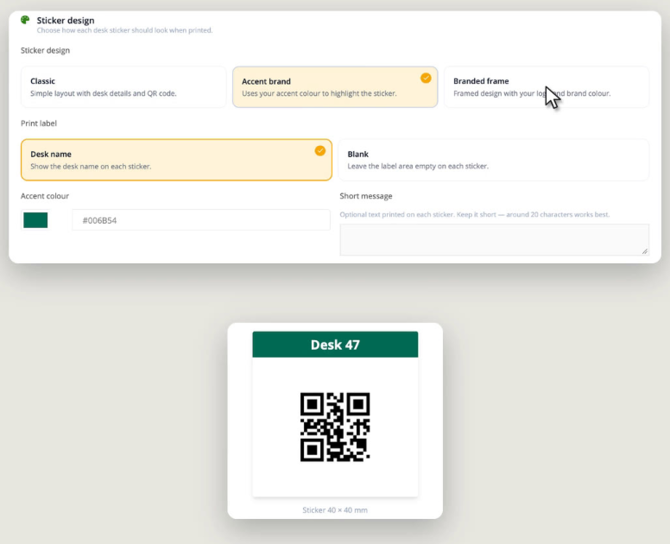
- Accent brand: uses your accent colour to highlight the sticker.
- Branded frame: framed design with your logo and brand colour.
Step 4: Set the label, colour and message
- Under Print label, choose Desk name to print each desk's name, or Blank to leave the label area empty.
- Under Accent colour, pick a colour or type a hex code (for example #006B54).
- Optionally, add a Short message to print on every sticker, such as "Scan to book". Around 20 characters works best.
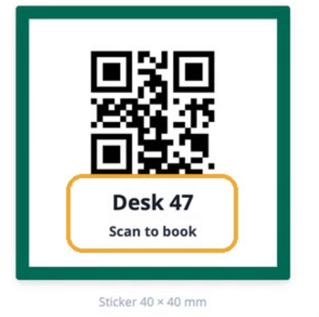
Tip: Click Download sticker PNG under the preview to save a copy of the design.
Order your stickers
Step 5: Choose the print specification
Under Print specification, choose how your stickers are made. These details go to our print partner, Diginate.
|
Setting |
Options |
|---|---|
|
Sticker type |
Vinyl (durable outdoor vinyl) or Metallic (mirror, brushed or holographic) |
|
Material finish |
Gloss vinyl, Matt vinyl or Clear vinyl |
|
Shape |
Square, Circular or Rounded square |
|
Sticker size |
40 × 40 mm (compact, recommended), 50 × 50 mm (standard) or 60 × 60 mm (larger) |
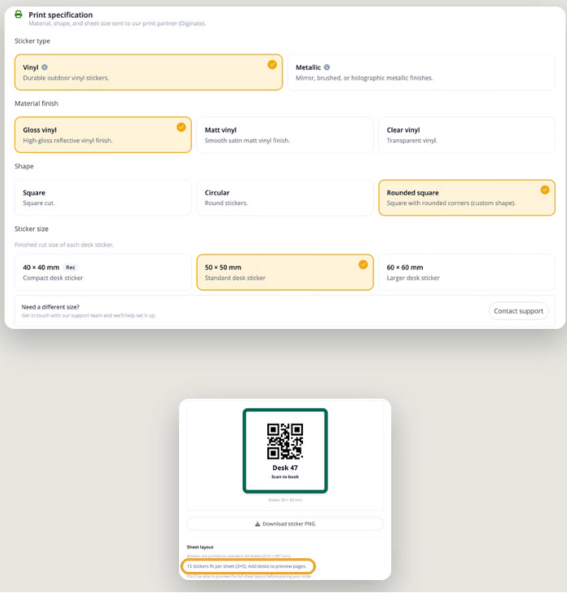
The sheet layout preview shows how many stickers fit on each A4 sheet. For example, 24 stickers (4 × 6) at 40 × 40 mm, or 15 stickers (3 × 5) at 50 × 50 mm.
Step 6: Choose the desks to print
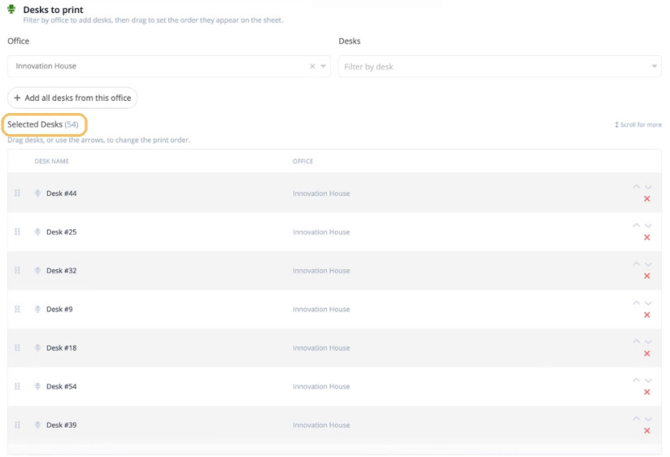
- Under Desks to print, select an Office.
- Click Add all desks from this office to add every desk in one go, or use Filter by desk to add specific desks.
- Check the Selected Desks count to confirm how many stickers you're ordering.
- Drag desks, or use the up and down arrows, to set the order they appear on the sheet. Click the red × to remove a desk.
Step 7: Check out
Click Checkout under the live preview to place your order. Not ready yet? Click Save draft to come back to it later.
Your order will then appear on the Desk QR sticker orders page.
Tips and FAQs
Can I see the sticker before I order? Yes. The live preview updates with every change, and you can download it as a PNG.
Which size should I choose? 40 × 40 mm is the recommended compact size and fits the most stickers per sheet. Choose 50 × 50 mm or 60 × 60 mm if you want them easier to spot.
What should my short message say? Keep it to around 20 characters, such as "Scan to book" or "Scan to check in".
Can I print stickers for more than one office? Yes. Select another office under Desks to print and add its desks to the same order.
What do people see when they scan a sticker?
See Desk QR codes: scan to book or check in.